12 Best AI Music Generator Free Tools in 2025
ai music generator free
Welcome Offer! Get 56% OFF!


Discover how image to video ai turns photos into dynamic videos with easy, actionable steps.
Ever looked at a stunning photo and thought, "This is amazing, but what if it could move?" That's exactly where image to video AI comes in. This isn't science fiction anymore; it’s a seriously cool way to breathe life into still pictures, turning a single frame into a captivating video clip without breaking a sweat.
Think about it. No more wrestling with complicated animation software or spending hours learning a new skill. With the right AI tool, you become the director. The AI does the heavy lifting, analyzing everything in your photo—the clouds in the sky, the ripples on a lake, even the strands of a person's hair—and then cleverly adds realistic motion. A once-frozen moment suddenly has a pulse.
And this isn't some niche hobby. The AI video market is exploding, valued at USD 11.2 billion in 2024 and on track to hit a mind-boggling USD 246.03 billion by 2034. This tech is going mainstream, fast.
Alright, so you're ready to jump in. The first big question is, which tool do you use? The answer really boils down to what you're trying to accomplish. Are you a social media manager looking to make a quick, eye-catching post? Or are you a pro videographer trying to add some dynamic flair to a project?
This simple flowchart can help point you in the right direction.
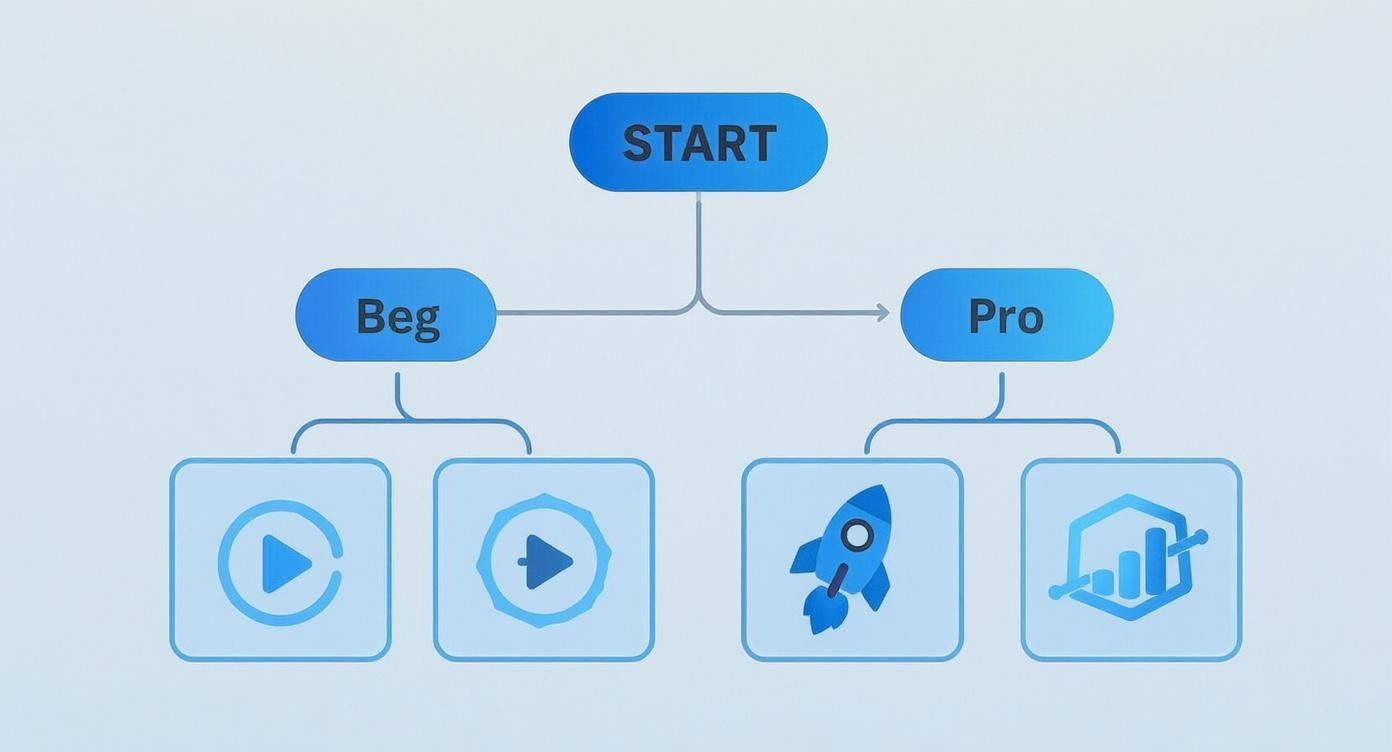
As you can see, your goal is everything. Picking a tool that matches your ambition is key to getting results you'll love without all the frustration. If you want to get into the nitty-gritty, you can learn more about the different types of tools available at https://sendfame.com/ai-video-generator.
What I love most about this is how it levels the playing field. You no longer need a Hollywood budget or a VFX degree to create something that looks absolutely incredible.
Want to see a perfect example of this in the wild? Check out what musicians are doing with album cover animation. It’s the same core idea—taking a static image and making it dynamic—and it's a brilliant way to grab an audience's attention.
Finding the perfect tool can feel overwhelming with all the options out there. This table breaks down some of the top players to help you figure out where to start based on what you want to create and how much experience you have.
| AI Tool | Best For | Key Feature | Ease of Use |
|---|---|---|---|
| Runway Gen-2 | Creative professionals and filmmakers | High-quality cinematic motion & extensive controls | Intermediate |
| Pika | Social media creators and beginners | Fast, fun animations with a user-friendly interface | Very Easy |
| CapCut | All-in-one mobile video editing | Integrated image-to-video within a full editor | Easy |
| LeiaPix | Adding 3D depth and parallax effects | Unique 3D "lightfield" animation from 2D images | Easy |
Each of these tools has its own personality and strengths. My advice? Try a couple of the "Easy" ones first to get a feel for the process. You'll be surprised at how quickly you can start making magic.
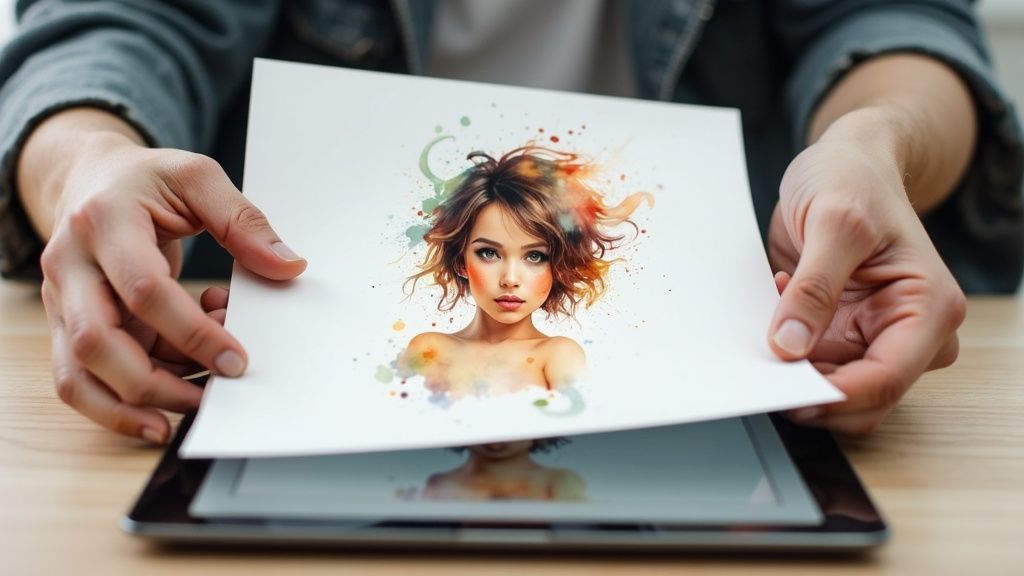
Think of your starting image as the star of the show. If you send a blurry, low-quality actor onto the stage, you can't expect a blockbuster performance. It’s the oldest rule in the book, and it's especially true for AI: garbage in, garbage out. A stunning video starts with a stunning image. Simple as that.
I can't stress this enough: start with the highest resolution image you can get your hands on. A crisp, detailed photo gives the AI a rich dataset to work with, which translates into smoother, more believable motion. That grainy, pixelated photo from your 2005 flip phone? It’s going to produce a glitchy, artifact-riddled mess that looks more like a horror film than a living memory.
But don't toss out your favorite shot just because it's a bit fuzzy. This is where AI upscalers come to the rescue. These magical tools can intelligently boost the resolution and sharpen details, giving your old photo a new lease on life. If you're curious, you can learn more about how to use an AI image upscaler to enhance your photos.
It’s not just about pixels; the content of your image is a huge deal. The AI needs to easily tell your subject apart from the background. An image with bold contrast and a clear focal point will perform circles around a flat, washed-out photo.
For instance, a classic portrait where the person is sharp and the background is nicely blurred is practically a dream for an AI. It knows right away what needs to be the center of attention and where it can add some subtle, atmospheric movement.
My biggest "aha!" moment was realizing the AI isn't a mind reader. A simple crop to remove distracting elements or a quick contrast boost in a photo editor told the AI exactly what I wanted it to focus on, and the results improved dramatically.
You don't need to be a Photoshop pro. A few simple tweaks can make all the difference:
Crop It: Get rid of any distracting junk around your main subject. A tighter shot is a better shot. Boost the Contrast: Make your subject stand out from the background. Just a little nudge can work wonders. Tweak the Colors: A quick auto-correction can make the colors look more vibrant and natural.
These small prep steps are like giving the AI a perfectly clear set of instructions. It's not about heavy-duty photo editing; it’s about making a few smart moves to set your video up for a win.
Alright, this is where the real fun begins. You’ve got your perfect image, and now it’s time to play director. Your text prompt is your megaphone, the main way you tell the image to video ai what’s in your head. Getting this part right is what separates a generic, wobbly animation from a piece of art that actually feels alive.
Forget lazy commands like "animate this." You need to think more like a novelist or a filmmaker. Instead of just telling the AI to 'animate the water,' give it some soul. Try something like, 'gentle waves lapping against the shore under a soft morning light.' See the difference? Specificity is your secret weapon. The more descriptive you are, the more the AI has to work with.
It’s this kind of creative control that has the market absolutely booming. The global AI video generator market was valued at USD 614.8 million in 2024 and is predicted to explode to USD 2,562.9 million by 2032. This insane growth, which you can read more about on the Fortune Business Insights website, shows just how many people are jumping in to direct their own AI-powered masterpieces.
While your prompt is the script, most AI tools also give you a control panel to fine-tune the performance. Think of these settings as your post-production suite—they're essential for dialing in the perfect look and feel.
You’ll usually find controls for stuff like:
Motion Intensity: This is your "drama" dial. A low setting is perfect for subtle, ambient motion. Crank it up, and you get high-energy, almost chaotic action. Camera Controls: This is your virtual camera crew. You can tell it to pan left, tilt up, or zoom in, adding a cinematic touch that a simple prompt can't always capture. Seed Number: Some platforms have this. A "seed" is basically a unique ID for a specific result. If you get a video you mostly like, you can use the same seed number again while tweaking the prompt to get a similar, but slightly different, outcome.
I once wasted an hour trying to get the perfect slow zoom on a landscape shot using only my words. It was a mess. The moment I found the dedicated "zoom" slider in the advanced settings, it took me ten seconds. Seriously, don't ignore the built-in controls!
Staring at a blank prompt box can be daunting. To help you get started, here are a couple of my go-to formulas that deliver consistent results. And if you're getting into text-based creation, you might want to check out our guide on how to use an AI image generator, which digs into similar ideas.
This is my bread and butter. It’s simple, direct, and incredibly effective.
Weak Prompt: "Animate the dog." Better Prompt: "A golden retriever joyfully chasing a red ball across a sunny field."
This one’s for when you want to feel like a real director. It adds camera cues for a more polished, professional feel.
Weak Prompt: "Make the car move." Better Prompt: "A vintage red convertible cruising down a coastal highway at sunset, slow camera pan from left to right."
Play around with these formulas. Change one word, adjust one setting, and see how the AI reacts. This back-and-forth process of tweaking and regenerating is how you’ll truly get the hang of directing your AI.
Okay, let's be real. That first moment you hit "generate" and watch your static image start moving is pure magic. It feels like you've unlocked a superpower. But hold on—don't hit that upload button just yet.
Think of that initial clip as your raw clay. It's a fantastic starting point, but the real artistry comes from adding that essential human touch. This is where you elevate a cool tech demo into something that actually connects with people.
Sometimes, this just means hopping back into the AI tool. You might need to refine your prompt, try a different seed number for a fresh take, or just crank the motion up or down until it feels right. Other times, the best move is to grab your favorite clips, export them, and jump into a proper video editor.
Never, ever underestimate what good audio can do. The right song or a few clever sound effects can completely change the vibe of your video. A simple piano track can make an animated landscape feel calm and peaceful, while a punchy electronic beat gives a product shot an energetic, modern feel.
This is also your chance to clean up the little imperfections. Most AI-generated clips have a slightly wonky start or finish. Don't be afraid to get your hands dirty with some basic edits:
Trim the fat: Snip off the first and last few frames. This is the secret to creating a clean, seamless loop that looks super professional. Create a montage: Why stop at one? Stitch several AI animations together to build a longer, more interesting story. Add your branding: Overlay your logo, a call-to-action, or some simple text to give the video context and purpose.
Once you get the hang of it, you can dive into more advanced stuff. For some inspiration, check out our guide on applying some truly mesmerizing AI video effects that will make your content pop.
Here's a pro tip I learned the hard way: always export a few different versions from the AI tool. Having three or four slightly different takes gives you so much more creative freedom in the editing phase. You’ll thank me later.
The demand for these tools is exploding. The generative AI market is getting a huge boost from this image-to-video tech, especially for creators and small businesses. We're seeing this democratization of video creation lead to massive adoption in marketing, education, and entertainment. You can read more about this industry growth on grandviewresearch.com.
You don't need a massive budget or fancy software for this, either. Free tools like CapCut or the free version of DaVinci Resolve are ridiculously powerful and more than enough to get the job done. That final polish is what separates the amateurs from the pros, and it’s easier to achieve than you think.
Alright, you've figured out how to bring your photos to life. Now for the fun part: what do you actually do with this new superpower? This is where you go from creating a neat little effect to making content that truly stops people in their tracks.
Think beyond a simple social media post. Imagine your website's main banner subtly moving, drawing visitors in the moment they land on your page. A flat product photo is fine, but one that animates to show off the sparkle on a piece of jewelry? That’s how you make a sale.
This image to video ai trick is honestly a game-changer for anyone telling a story or building a brand. It's about adding that extra "wow" factor that makes people remember you.
Let's get practical. I've seen marketers take their best ad creative, add a little motion, and watch their engagement rates climb. Digital artists are using this to breathe life into their portfolios, giving their work an entirely new dimension.
Here are a few ways I’ve seen this work brilliantly:
Scroll-Stopping Social Ads: Animate your best product shots and turn them into short, looping videos for Instagram or Facebook. It’s practically guaranteed to catch more eyes than a static image. Bringing Memories to Life: Take old family photos and add a bit of motion. It creates an incredibly touching video for an anniversary or a family get-together. Seriously, try it. Presentations That Don't Suck: Ditch the boring stock photos in your next slide deck. A few subtle animations will keep everyone in the room glued to the screen instead of their phones.
I think the most powerful use is in pure storytelling. A simple animated portrait, with a subtle shift in expression, can hit you with more emotion than a whole paragraph of text. It's all about making that connection.
And don't stop there. Once you're comfortable with animated images, you can explore other cool tech like interactive AR filters that blend digital creations with the real world. The moment you stop seeing your images as static endpoints, a whole new world of creative possibilities opens up.
Diving into any new creative tech always feels a bit like fumbling around in the dark at first. As you start playing with image-to-video AI, you're bound to have a few "wait, how does this work?" moments. Let's clear up the common hurdles so you can skip the headaches and get right to making cool stuff.
Think of this as your personal FAQ, the kind of advice a friend would give you over coffee.
This is probably the biggest question, and the answer is simple: give the AI something good to work with. High-resolution photos with a crystal-clear subject are your best bet. The AI thrives on clean lines and obvious focal points. Picture stunning landscapes, portraits where the subject pops, or sharp product photography.
On the flip side, you'll want to steer clear of a few things:
The "Where's Waldo?" effect: Super cluttered images with a million things going on will just confuse the AI. It won't know what to animate. Fuzzy or washed-out pics: If the details are blurry or the contrast is low, the AI will struggle just as much as you do to see what's what. Flat, one-dimensional shots: Images with natural layers—like a person in front of a mountain range—are gold. They give the AI a playground for creating awesome depth and parallax motion.
Here's a tip that saved me a ton of frustration: Treat the AI like a junior designer. Give it a clear brief (a clean image), and it'll knock it out of the park. Hand it a messy, confusing jumble (a cluttered photo), and well... you get what you give.
You are absolutely in the director's chair! This is where the real fun begins. Your primary controls are your text prompts and the specific motion settings inside whatever tool you're using. A killer prompt is your magic wand.
For example, don't just say "animate this." Get specific. Try something like, "slowly drifting clouds behind the mountain" or "steam gently rising from the coffee cup."
Most platforms also give you granular control over things like camera movement. You can often adjust the intensity of a zoom, the speed of a pan, or the angle of a tilt. When you combine a powerful prompt with these hands-on adjustments, you have a shocking amount of creative control. You’re not just hitting a button and hoping for the best; you're crafting the exact scene you have in your head.
Ready to stop wondering and start creating? SendFame has everything you need to transform your static images into head-turning videos in minutes. See what's possible at https://sendfame.com.
Create Epic
SendFame
Create Epic with SendFame!
Questions: info@sendfame.com