How to Overcome Creative Block and Find Your Spark
how to overcome creative block
Welcome Offer! Get 56% OFF!


Learn how to make AI generated images with our beginner-friendly guide. Master prompt writing, tune settings, and create stunning AI art in minutes.
So, you want to learn how to make AI-generated images? It’s way easier than you might think. All it really boils down to is describing what you want to see, picking a style, and letting a platform like SendFame do the heavy lifting. That's it. You're basically translating your thoughts into unique visuals with a few keystrokes.
Ever had a brilliant visual idea pop into your head but lacked the artistic chops to bring it to life? That’s where AI image generation comes in. Forget the complicated technical manuals; this guide is your personal roadmap to becoming a confident creator. We're jumping straight into the fun part—making cool stuff.
Think of this as your creative kickstart. By the time we're done, you'll have the essentials down and be ready to generate something awesome. To give you a feel for it, here’s a peek at the SendFame workspace—this is where the magic happens.

The whole setup is designed to be clean and simple, putting the focus right where it belongs: your prompt. This little text box is the starting point for everything.
Making art from text isn't just some quirky internet trend anymore—it's a full-blown industry. The global market for AI image generators was valued at around USD 418.5 million and is expected to balloon to a staggering USD 2.63 billion by 2035. That's not just growth; it's an explosion, proving just how many people are jumping into this new creative playground.
This whole movement isn't about replacing human artists. It’s about giving everyone the power to visualize their ideas. The tools have become so user-friendly they’ve demolished the old barriers that required pricey software and years of training. For a closer look at the nuts and bolts, you can check out our other guide right here: https://sendfame.com/blog/how-to-use-ai-image-generator.
The real beauty of AI image generation is that it acts like a creative partner. You give it a rough idea, and it fires back a visual interpretation—often in ways you never would have imagined. It’s a fantastic way to spark new creative directions.
As you start playing around, it's pretty interesting to think about the evolving relationship between AI and human creativity. It's less of a competition and more of a collaboration, where technology just gives our imagination a massive boost.
This guide is all about hands-on action. We're ditching the dry theory and focusing on practical steps you can use right now. You’ll learn how to:
Get Around the Workspace: Find your way around the essential tools and settings in a platform like SendFame without feeling lost. Write Killer Prompts: Master the art of writing descriptions that get the AI to see what's in your head. Tweak the Settings: Figure out how to adjust things like style, composition, and quality to get the perfect result. Fix and Polish: Learn how to troubleshoot common hiccups and refine your images until they're just right.
To get you started on the right foot, here's a super-quick rundown of the essentials for creating your first AI image on a platform like SendFame.
| Action | Why It Matters | Quick Tip |
|---|---|---|
| Sign Up & Explore | Familiarity is key. Get a feel for the layout before you start generating. | Spend 5 minutes just clicking around. No pressure, just explore! |
| Start with a Simple Prompt | Don't overcomplicate it. A clear, simple idea is easier for the AI to understand. | Try "a blue cat sitting on the moon" instead of a long, complex sentence. |
| Choose a Style | The style sets the entire mood and aesthetic of your image. | "Photorealistic" and "Cartoon" will give you wildly different results. Experiment! |
| Generate & Review | This is the moment of truth! See what the AI comes up with. | Don't expect perfection on the first try. The fun is in the refinement. |
| Refine Your Prompt | Add or remove details based on your first result to get closer to your vision. | If the cat wasn't blue, specify "a vibrant blue cat." Be more direct. |
This table is your cheat sheet. The goal isn't just to make an image but to understand the creative process behind it. We’re ready to move beyond the basics and get into the real fun. Let's do this.
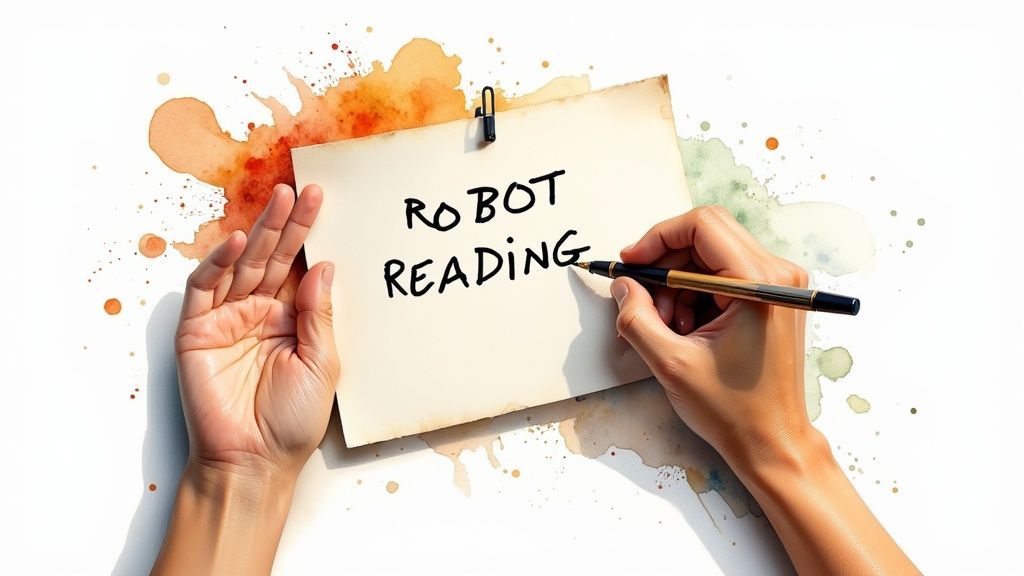
Let's be real—the secret sauce behind those jaw-dropping AI images isn't some complex, hidden setting. It's the words you choose. Think of yourself as a film director and your prompt as the script. You're guiding the AI, telling it exactly what masterpiece you've got cooking in your head. It’s how you get from a simple idea like "a robot reading" to something truly unforgettable.
This whole process is really a creative conversation between you and the machine. You bring the vision, and it brings the pixels. Getting good at that back-and-forth is the key to getting consistently amazing results.
A great prompt is so much more than a noun and a verb. It’s a rich, descriptive paragraph that paints a vivid picture for the AI to interpret. I've found it helps to break it down into four core parts to make sure you're covering all your bases.
Here are the four pillars I always think about:
The Subject: This is your "what." And I mean, really get specific. Don't just say "a dog." Try "a fluffy, clumsy golden retriever puppy with oversized, floppy ears." The details matter. The Style: This is the "how," and it sets the entire mood. Are you going for a photorealistic shot, a whimsical cartoon style, or maybe something artsy like "in the impressionist style of Monet"? The Lighting: Never, ever underestimate the power of lighting. It can completely transform the vibe of an image. Toss in phrases like "golden hour," "dramatic studio lighting," or "eerie neon glow" to see what I mean. The Composition: This is your camera work—the "where" and "how it's framed." Use photography terms like "wide-angle shot," "close-up portrait," or "cinematic view from a low angle" to take control of the perspective.
When you start layering these elements together, a simple idea quickly blossoms into a detailed command. It's this level of detail that lets you generate AI images from text that genuinely pop off the screen.
Okay, let's put this into practice. We'll take our simple "robot reading" idea and build it into something with real character.
Basic Prompt: a robot reading a book (Meh. You'll get something, but it won't be special.) Adding Detail: a vintage tin robot sitting in a leather armchair, reading an old hardcover book (Better! We've got a specific character and setting now.) Introducing Style & Lighting: a vintage tin robot sitting in a leather armchair, reading an old hardcover book, golden hour lighting streaming through a window, photorealistic, hyper-detailed (Now we're talking. The mood is set.) Setting the Scene: a vintage tin robot sitting in a leather armchair in a cozy, cluttered library, reading an old hardcover book, golden hour lighting streaming through a window casting long shadows, photorealistic, hyper-detailed, 8k resolution (Boom! That's a scene.)
See the difference? Each new layer of detail strips away ambiguity and nudges the AI closer to your exact vision. Honestly, this iterative process is half the fun.
The best prompts I've written often read like a scene description from a movie script. They're evocative, specific, and packed with sensory details that help the AI "see" your idea more clearly.
Sometimes, what you don't want in an image is just as crucial as what you do. This is where negative prompts become your secret weapon. Think of it as your "do not include" list for the AI.
Ever generated an image with creepy six-fingered hands or a face that just looks... off? Negative prompts are your new best friend. By adding terms like ugly, deformed, extra limbs, blurry, bad anatomy to the negative prompt field, you can clean up your results dramatically.
It’s an incredibly powerful technique for refining your output and dodging those common, weird AI quirks. This simple step can make your images look so much more professional. With an estimated 34 million AI-generated images being created every single day, the tools are getting smarter, but a little human guidance goes a long way. This explosive growth shows just how fast this creative field is moving.
Alright, let's get into the fun stuff. Moving beyond the prompt box is where you go from being a passenger to the pilot, really taking the controls of your creative output. The advanced settings in platforms like SendFame aren't just for tech geeks; they’re your toolkit for getting exactly what you want, every single time.
Think of it like being in a recording studio. Your prompt is the song, but these settings are the knobs and dials that control the mix, the volume, and the overall vibe. Getting a handle on just a few of these will completely change your AI image game.
First up is aspect ratio, which is just a fancy way of saying "the shape of your image." It might seem like a small thing, but it’s the foundation of your entire composition. Are you making an Instagram Story? You’ll want a tall 9:16 ratio. Creating a cinematic desktop wallpaper? A wide 16:9 is your best bet.
Picking the right aspect ratio from the get-go saves you from a world of awkward cropping later. It also subtly tells the AI how to think about your scene. A vertical format nudges it towards portraits and towering structures, while a horizontal one is perfect for sweeping landscapes and group shots. It's a simple click with a massive impact.
Next, let's talk about the Guidance Scale, which you'll often see labeled as CFG. This little slider is basically the leash you put on the AI's creativity. It dictates how literally the AI has to follow your prompt.
Low CFG (around 1-6): The AI gets a lot of creative freedom. Your prompt is more of a gentle suggestion. This can lead to some beautifully unexpected, artistic, and sometimes downright weird results. It's perfect for when you're chasing an abstract or dreamy aesthetic. High CFG (around 8-15): The AI sticks to your instructions like glue. This is what you want when you have a super specific vision and need every detail to be just right. If you’re describing a character with "green eyes and a scar over their left eyebrow," a higher CFG makes sure you get it.
There's no single "correct" number. I’ve found the sweet spot is usually somewhere between 7 and 10, which gives you a great balance of control and creative surprise.
Think of the CFG scale like giving directions. A low CFG is like saying, "Head downtown and find a cool coffee shop." A high CFG is like saying, "Go to 123 Main Street, turn left, and enter the third door." Both get you coffee, but the journey and the final destination are totally different.
Ever generate an image you absolutely loved but then couldn't, for the life of you, get anything like it again? The seed number is your secret weapon. Every single image generation starts with a bit of random static, and the seed number is the unique digital fingerprint for that starting point.
By using the same seed number with the exact same prompt, you can generate an almost identical image. This is a game-changer when you're trying to create a consistent character or maintain a specific style across a series of images. Want to make a small change? Just keep the seed and tweak a word or two in your prompt to see what happens.
Here’s a quick rundown of the most important settings and when you should be tweaking them.
| Setting | What It Does | When to Use It |
|---|---|---|
| Aspect Ratio | Controls the width and height of your image (e.g., square, portrait, landscape). | Set this first. Match it to your final use case, like social media posts, desktop wallpapers, or print. |
| CFG Scale | Dictates how closely the AI follows your prompt. Low is creative; high is literal. | Use a low CFG (1-6) for artistic exploration. Use a high CFG (8-15) for precise, detailed scenes. |
| Seed Number | A unique ID for an image's starting point. Reusing a seed reproduces a similar result. | When you love an image and want to create variations or a consistent series. Lock it in! |
Getting a feel for these controls is a huge leap forward. Once you’re comfortable, you can dive even deeper by taking your creations into the SendFame AI image editor, where you can make fine-tuned adjustments after the fact.
Clicking "generate" is a thrill, but let's be real—it's rarely the final step. The true artistry kicks in when you add your own creative finesse. The AI might get you 90% of the way to something amazing, but a few smart edits after the fact can launch your image into another stratosphere.
This is where you switch hats from prompter to editor. You're taking a great AI draft and giving it the polish and perfection only a human eye can provide.
Ever generate an otherwise perfect portrait, but the AI gives your subject six fingers? Or maybe a stunning landscape with a weird, blob-like object floating in the sky? Don't toss it! This is exactly what inpainting was made for.
Think of it as hyper-focused regeneration. You can draw a mask over just the messed-up part of the image and give the AI a new, specific prompt for that area alone.
So, for that six-fingered hand, you’d simply mask the hand and prompt something like, “a realistic human hand with five fingers.” The AI reworks just that spot, leaving the rest of your masterpiece untouched. It's a lifesaver for fixing those little AI quirks that can drive you crazy.
What about the opposite problem? You've got an amazing image, but it feels too cramped. You wish you could just zoom out and see what's beyond the frame. Well, you can. It’s called outpainting.
This tool lets you literally expand the canvas. The AI then intelligently predicts what the rest of the scene should look like, filling in the new space in the same style.
Imagine you have a tight shot of a lone knight on a hill. With outpainting, you could extend the canvas to reveal the epic battle raging in the valley below or the majestic dragon flying overhead. It’s like discovering the rest of the world your image lives in.
Your first generation is the block of marble. Inpainting and outpainting are your chisel and hammer, letting you carve, correct, and expand until the final piece matches the vision in your head.
You did it. You’ve tweaked and polished your image into a work of art. But when you try to use it for anything serious, it looks a bit… fuzzy. That’s because most AI generators create images at a relatively low resolution to keep things speedy.
The fix is upscaling. Modern AI upscalers are brilliant; they don't just stretch the image. They use complex algorithms to intelligently add pixels, sharpening details and increasing the resolution without making it look blurry or artifacted.
Suddenly, your image is ready for a high-quality print, a professional portfolio, or just looking razor-sharp on a 4K display. It’s the final technical step to make your art truly shine. To get the full scoop on this, you can learn more about how to use an AI upscaler to enhance your images and get them ready for any project you can dream of.
Alright, theory is one thing, but let's be honest—the real fun begins when you start making stuff. This is where the lightbulb moments happen, when all those settings and sliders click into place and you see a real project come to life. It’s the difference between knowing what a hammer does and actually building a bookshelf.
The AI image generator market is absolutely exploding. We're talking a projected value of over USD 917 million by 2030, with North America at the forefront. This isn’t just hype; businesses and creators are finding seriously powerful ways to make incredible visuals. If you're a data nerd, you can dive deeper into the global market expansion and see just how fast this whole field is growing.
Let’s get our hands dirty with a couple of practical projects.
Imagine you’re in charge of social for a brand-new coffee company called "Cosmic Brew." The whole vibe is modern, energetic, and a touch futuristic. Your mission? Create a trio of jaw-dropping visuals for their Instagram launch.
The Creative Brief:
Visual 1: A killer product shot. Visual 2: A lifestyle photo of someone enjoying the coffee. Visual 3: An abstract graphic that screams "Cosmic Brew."
First up, the product shot. We need this thing to stop thumbs mid-scroll.
Let’s try a prompt like this: "Professional product photography of a sleek black coffee bag with 'Cosmic Brew' in futuristic font, floating in zero gravity with swirling stardust, hyperrealistic, dramatic studio lighting."
For this, I’d lock in a 1:1 aspect ratio to fit perfectly in the Instagram grid. I'd also probably bump up the CFG scale to make sure the AI really nails the look of the bag and the text.
Next, the lifestyle shot. We need to connect with people.
Here’s a good starting point: "A stylish young woman with vibrant pink hair laughing while sipping coffee from a 'Cosmic Brew' mug, sitting in a minimalist cafe with neon purple accents, candid shot, cinematic bokeh effect."
This time, I'd switch to a 4:5 aspect ratio, which takes up more screen real estate on a phone. This is where the magic really happens—you're not just generating a picture; you're blending a human, emotional element with a very specific brand aesthetic.
Pro Tip: When you're creating a set of images for one brand, do yourself a favor and create a "keyword bank." For Cosmic Brew, I'd keep terms like "neon purple accents," "futuristic," and "sleek black" on a sticky note. Weaving these into each prompt is the secret to building a cohesive, instantly recognizable visual style.
Let’s totally switch gears. Now you're an artist tasked with designing the cover for an epic fantasy novel, "The Last Dragon of Silverwood." The author's one-line pitch? "Epic and atmospheric." No pressure.
The Concept: A lone, majestic dragon perched on a glowing, ancient tree in a magical forest.
Time to get descriptive. My first pass at a prompt would be something like this:
"Epic fantasy book cover art of a majestic silver dragon with glowing blue eyes, perched on a colossal, ancient tree that emits a soft light. The enchanted forest is filled with misty, moonlit fog. Style of a detailed digital painting, cinematic composition, 9:16 aspect ratio."
This kind of project is a perfect example of where post-generation editing becomes your best friend. The AI might give you a fantastic dragon, but maybe the forest in the background feels a little flat. No problem. Use outpainting to expand the world and add more depth, or use inpainting to carve some glowing runes into the tree bark for that extra touch of magic. It's a dance between generation and refinement.
And while we're talking about creative work, it’s amazing to see how these tools are being used in other industries. In fashion, for example, it’s powering things like AI clothing try-on technology.
Ultimately, it doesn't matter if you're building a brand or a whole new world. The path to amazing results is paved with clear, descriptive prompts and a willingness to tweak, refine, and iterate.
Once you start tinkering with AI image generators, you'll inevitably run into a few head-scratchers. Trust me, we've all been there. Let's tackle some of the most common questions that pop up when you're getting your feet wet.
Ah, the classic "AI gave my subject six fingers" problem. It's the rite of passage for every AI artist. You've probably noticed that hands and faces, in particular, can come out looking... well, a little funky.
There's a good reason for this. These parts of the human body are incredibly complex, with a dizzying amount of detail and subtlety. AI models can sometimes get tripped up trying to piece it all together, just like a budding artist struggles with drawing hands.
So, how do you fix it? A couple of tricks work wonders. First, get super specific in your prompt. Instead of just "hands," try "detailed realistic hands with five fingers." Another pro move is to use a negative prompt to tell the AI what to avoid. I often use phrases like "malformed hands, extra limbs, bad anatomy." Sometimes, the best strategy is to generate a handful of options and then use an inpainting tool to clean up the best one.
It helps to remember that prompting is just one part of the equation. The whole creative process is a dance between brainstorming, generating, and then refining your work.
Here’s a great way to visualize that workflow:

As you can see, your human touch is what really makes the final image shine.
This is a big one, and the answer almost always lives in the platform's terms of service. Good news: many modern generators, including SendFame, grant you full commercial rights to whatever you create. If you made it, it's yours.
That said, make it a habit to always, always check the licensing agreement for any tool you're using. You also have to be smart about copyright. If your prompt describes Mickey Mouse or a Nike logo, you could be wading into some tricky legal waters.
Consistency is king, especially when you're working on a brand, a comic, or any project that needs a cohesive feel. The magic here lies in a killer prompt and a little something called a "seed number."
To lock in a consistent style, create a detailed style "recipe" that you can use over and over. Think of it as your secret sauce. Examples could be:
"minimalist vector art style" "vibrant pastel colors" "grainy retro film look"
Now, for characters. Once you generate a character you absolutely love, find its seed number. By plugging that same seed back into the generator along with a similar prompt, you're telling the AI to use the same starting point. This is the key to getting visually related results that make your creative world feel connected and believable.
Ready to put all this into practice? SendFame has everything you need to turn your wildest ideas into stunning visuals with just a few clicks. Stop wondering and start creating your own AI images today.
Create Epic
SendFame
Create Epic with SendFame!
Questions: info@sendfame.com